Git Commands: 21 Must-Know Options

Anyone who uses Git, or has even seen it for that matter, knows there are a lot of terms and modifiers to keep up with.
And keep up, you must, as it’s become the standard in version control for tech products today.
But instead of just expecting you to keep it all in your head, we put together this go-to resource full of critical commands for you to reference so you can use Git both effectively and efficiently.
Not a Git super user (yet)? That’s perfectly fine.
The commands we’ll detail here range from the everyday to the more rare and complex. And, as an added bonus, each is joined by tips on ways you can use it during a development project.
We’ll kick things off with some info on Git’s background, then wrap up with a full walkthrough of how you might use Git in a real-life setting.
Quick Debrief: Understanding Git, GitHub, & Version Control
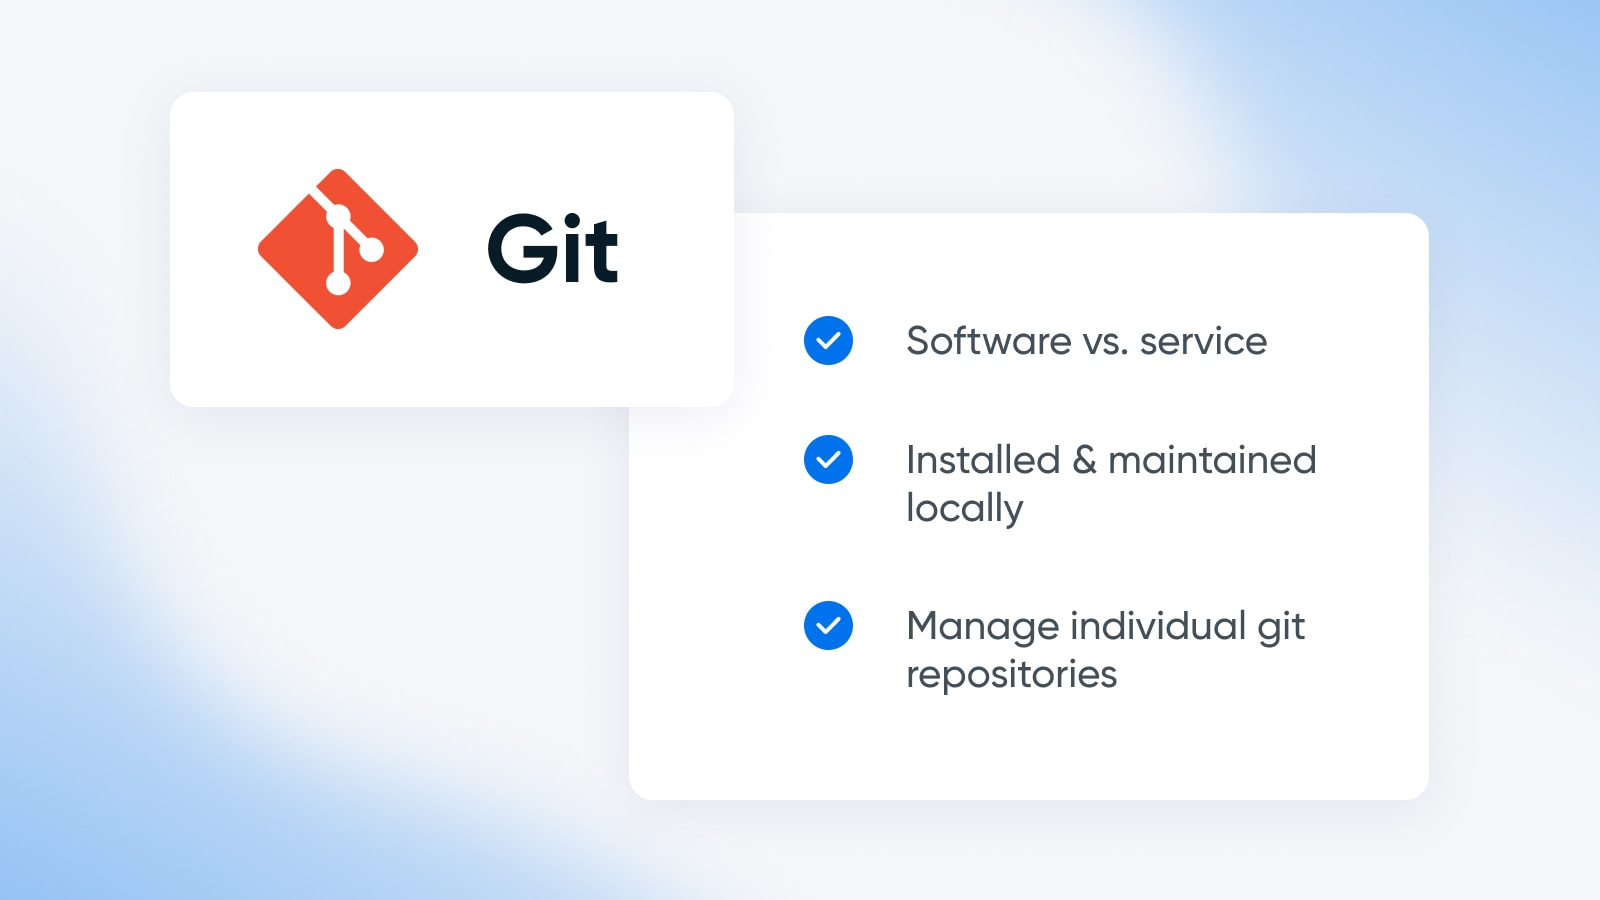
Git is what its builders call a Source Code Management (SCM) platform. In other words, it’s a version control system. One that’s free, easy to use, and thus at the core of many well-known projects.
Which brings us to a logical question if you aren’t immersed in the world of development: What exactly is version control?
Building something from code frequently takes a lot of trial, error, and steps. And, in many cases, collaboration.
It’s easy for important elements that took a lot of effort to get overwritten or lost. For example, if you’ve ever worked with a colleague in a live Google Doc, you understand what we mean.
A version control tool basically saves each iteration of your progress throughout a project. This is helpful in case you want to rewind to a previous version to review and grab certain elements to reuse — or even restore an older version if something in the current build isn’t working as intended.
Git is installed locally, meaning it exists on your computer instead of in the cloud. In fact, you don’t even have to be connected to the internet when using it!
In this way, it provides a secure repository (often called a “repo,” which is a storage space for code) for a developer to save every “draft” of a project they’re working on.
Git takes this one step further with the branching model for which it has become known.
With Git, a developer can create various code “branches” that extend from a project. These branches are basically copies of the main project, which used to be called the “master” project, but that term is being phased out.
Changes in branches don’t impact the code of the main project unless you tell them to. With branching, developers can do things like experiment with new features or fix bugs. The changes made in a branch won’t impact the main code unless you do something called “merging.”
Git makes perfect sense for website owners or developers working on their own projects. But what about when you need to work with a team on a coding project?
Meet GitHub.
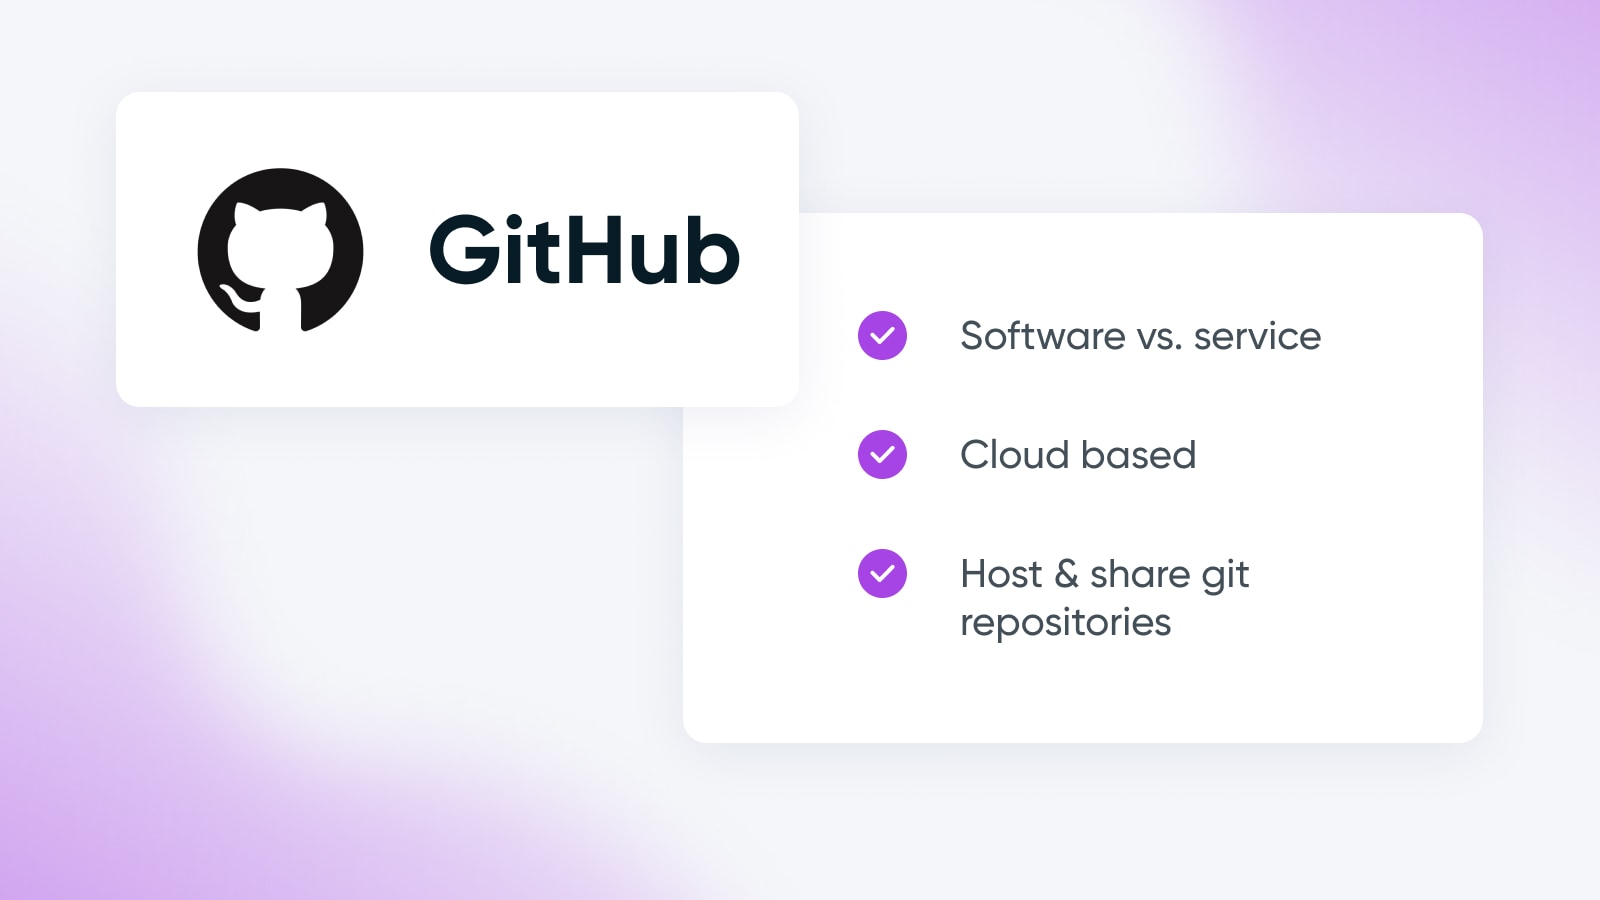
GitHub is a development platform for hosting Git repositories.
In other words, it’s how you get your Git repos off of your local machine and onto the internet, usually for the purpose of enabling people to collaborate on them.
GitHub is cloud based and for profit, though the basics can be used for free when you sign up.
The primary function of GibHub is enabling developers to work together on a singular project in real time, remotely making code revisions, reviewing each other’s work, and updating the main project.
GitHub maintains the core feature of Git: preventing overwriting and maintaining each saved version of a project. It also layers in all kinds of additional features and add-ons like increased storage, fast development environments, AI-powered code writing, code auditing support, and much more. (We recommend checking out the pricing page to see everything on offer.)
It’s important to note that GitHub isn’t the only service in this space. Alternatives include Bitbucket, GitLab, etc.
However, Git and GitHub of course work together like peanut butter and jelly, as you’ll see a little later in this article.
First things first: a complete list of all the Git commands developers and tech teams should be familiar with to find success in this version control environment.
Github
GitHub is a cloud-based service developers use to store their code, track new changes, and collaborate with other developers. It is a popular platform for collaborating in real-time on software projects.
Read More21 Of The Most-Used Git Commands You Should Know
Are you ready for the ultimate Git cheat sheet?
In this section we’ll dive into the Git commands, instructions, basically, that you need to know to use Git successfully. And, we’ll even throw on some tips on how you may use each of them in a project.
Pro tip for making the most of this document: Press “command + F” on a Mac or “Ctrl + F” on Windows to open a search box to find a specific command, if you’re looking for something in particular.
git config
git config is a helpful command for customizing how Git works on three levels: the operating system level (system), user-specific level (global), and repository-specific level (local).
Try out git config with these moves:
git config --global user.email [your email]
This is a command many devs run right after downloading Git to set up their email address.
git config --global user.name [your name]
For setting up your user name.
git config --local
Customize your local repository-specific settings. This will override default Git configs at the system and global levels.
Get Content Delivered Straight to Your Inbox
Subscribe to our blog and receive great content just like this delivered straight to your inbox.
git pull
git pull is your command for fetching code from a remote repo and downloading it to your local repo, which will then be updated to match what you just pulled.
This act of merging is foundational to using Git. And, it’s actually “shorthand” for two other commands: git fetch then git merge.
Here are a few ways this command is commonly used:
git pull [remote]
Fetch a specific remote repo and merge it with the local you’re working on.
git pull --no-commit [remote]
This command still fetches the remote repo, but does not automatically merge it.
Since pull is such a core Git command, there are tons of ways to use it. This guide to Git Branch Commands offers even more examples and some fresh combos you can try.
git fetch
git fetch as a standalone command downloads commits from remote repos into local repos. It gives you the chance to see and modify code from other devs.
Let’s try out this command:
git fetch origin
Downloads a copy of the origin remote repository and saves it locally. Nothing is changed or merged, unlike what git pull does by default.
git fetch --all
Grab data from all remote repos (origin included).
git fetch --shallow-exclude=[revision]
Excludes commits from a specific branch or tag.
Tag
A WordPress tag is a default taxonomy that enables you to categorize your posts. Readers can then click on a post’s tag to view similar articles with the same tag.
Read Moregit merge
The git merge command combines branches (most often two, but can be more) to create a singular history. Git will highlight conflicts that arise in the merge to be fixed.
Options for this command include:
git merge [branch name]
Use this to merge changes from the named branch into the branch you’re using.
git merge --abort
Stop the merge and restore the project to its pre-merge state. This command perfectly illustrates how Git helps maintain older code versions to protect project progress.
git add
git add is the command to use when you’re ready to “save” a copy of your work. It’s very often used in conjunction with the next command — git commit — as this adds (aka “commits”) what’s been saved to the project’s running history.
Here are some ways you can specify what to save (or “stage”) with this command:
git add [file]
This tees up all the changes you’ve made to a specific file so it can be included in the next commit.
git add [directory]
Similar to above, this cues changes to a specific directory so it’s ready for the commit.
git commit
git commit is the second command in the trifecta of making and tracking a change in Git.
This command basically says to store any changes that were made with the git add command. Not to make the changes to the main code, just to hold them safely.
Some options for using this command include:
git commit --amend
Modifies the last commit instead of creating a whole new one.
git commit -m [your message here]
Annotate your commit with a message, which goes inside the brackets.
git push
git push completes the collaboration cycle in Git. It sends any committed changes from local to remote repositories. From here, other developers on the project can start working with the updates. It’s the opposite of the fetch command.
Here’s how to use it:
git push [remote] [branch]
Push a specified branch, its commits, and any attached objects. Creates a new local branch in target remote repo.
git push [remote] --all
Push all local branches to a specific remote repo.
git branch
Create, edit, and remove branches in git with the git branch command.
Use the branch command in these ways:
git branch [branch]
This creates a new branch, which you can name by replacing the word in brackets.
git branch -c
This command copies a Git branch.
git push [remote repo] --delete [ branch name]
Delete a remote Git branch, named in the last set of brackets.
git checkout
Use the git checkout command to navigate among the branches inside the repo you’re working in.
git checkout [branch name]
Switch to a different Git branch, named within the brackets.
git checkout -b [new-branch]
Simultaneously create a new branch and navigate to it. This shortcut combines git branch and git checkout [new branch].
git remote
With the git remote command you can see, create, and delete remote connections, “bookmarks” in a way, to other repos. This can help you reference repos in your code without having to go find them and use their full, sometimes inconvenient names.
Try these remote commands:
git remote add [alias] [URL]
Add a remote repository by specifying its link and giving it an alias.
git remote -v
Get a list of remote connections, and include the URLs of each.
git revert
git revert undoes changes by creating a new commit that inverses the changes, as specified.
One way to (carefully!) use git revert is:
git revert [commit ID]
This will only revert changes associated with the specific commit that’s been identified.
git reset
git reset is a more risky and potentially permanent command for undoing commits.
This command should only be used in local or private repos to prevent the chances of interrupting anyone who’s coding in a remote, public repo. Since it can “orphan” commits that may then get deleted in Git’s routine maintenance, there’s a real chance this command can erase someone’s hard work.
This is a complex command that should be used with discretion, so before trying it for the first time we strongly recommend reading this Git Reset guide from Bitbucket.
git status
git status provides insights into your working directory (this is where every stored historical version lives) and staging area (kind of like the “under construction” area between the directory and repository). With this command you can see where your files stand.
There’s one primary way to use this command:
git status
See a list of staged, unstaged, and untracked files.
git clone
Use git clone to create a copy of an existing repository. This is useful for creating a duplicate of a repo in which you can play around without damaging anything that’s live to the public.
Here are some options for using this command:
git clone [repository URL] --branch [branch name]
Clone the linked repository, then jump right to a specific branch within it.
git clone [repo] [directory]
Clone a specific repository into a specific directory folder on your local machine.
git init
Use the git init command to create a new Git repository as a .git subdirectory in your current working directory. It’s different from git clone as it can create a new repository instead of only copying an existing one.
The most common applications of this command include:
git init
Where it all starts, this transforms your current directory into a Git repository.
git init [directory]
With this, you can turn a specific directory into a Git repository.
git init --bare
This generates a new bare repository, from which commits can’t be made. This creates a helpful staging ground for collaboration.
git rebase
git rebase has history rewriting powers that help keep your commits neat and clean.
It’s an option when you need to integrate updates into the main branch with a fast-forward merge that shows a linear history.
git rebase [target branch name]
Rebase your checked out branch onto a specific target branch.
git rebase [target branch name] -i
Initiate an interactive rebase from your checked out branch onto a different target branch.
This is another complex command that shouldn’t be used in a public repo as it may remove important elements of the project history. To learn more about how both the standard and interactive versions of this command work, we again recommend Bitbucket and their git rebase guide.
git diff
“Diffing” is the practice of displaying the variations between two data sets.
The git diff command shows variances between Git data sources such as comments, files, etc.
Options for using this command include:
git diff --staged
Shows the difference between what’s staged but isn’t yet committed.
git diff [commit ID 1] [commit ID 2]
This command compares changes between two different commits.
git tag
The git tag command points at a time in Git history, usually a version release. Tags don’t change like branches do.
git tag [tag name]
Use this to name a tag and capture the state of the repo at the time.
git tag -d [tag name]
Want to remove that tag? Run this command.
git rm
The git rm command removes files from both staging and the working directory.
Here are a few ways to try out git rm:
git rm [file]
This is the basic code to get a file ready for deletion in the next commit.
git rm --cached
This removes a file from the staging area, but keeps it in the working directory so you still have a local copy in case you need it.
git log
git log provides a, well, log of all the commits in the history of a repository.
Ready to try it out? Here we go:
git log [SHA]
A Secure Hash Algorithm (SHA) is a unique identifier for each commit. Use this command to display a certain commit as well as every other commit made previously.
git log --stat
The command displays which files were changed with each commit, number of lines added/removed, and number of files and lines edited.
git show
This git show command line provides details on different Git objects like trees, tags, and commits.
Here are a few ways to exercise this command:
git show [SHA]
The simplest of git show commands, Use the SHA that we just learned about above to show the details of any object.
git show [SHA]:path/to/file
This will show a specific version of a file you’re seeking when you include its SHA.
Still learning how to use Git, have any questions about the above commands, or just itching to dive into even more variations that you can use to manipulate your code in thousands of ways?
We have to shout out the Git tutorials from Bitbucket as a great, deep, and interconnected resource that can take you most places you want to go with Git.
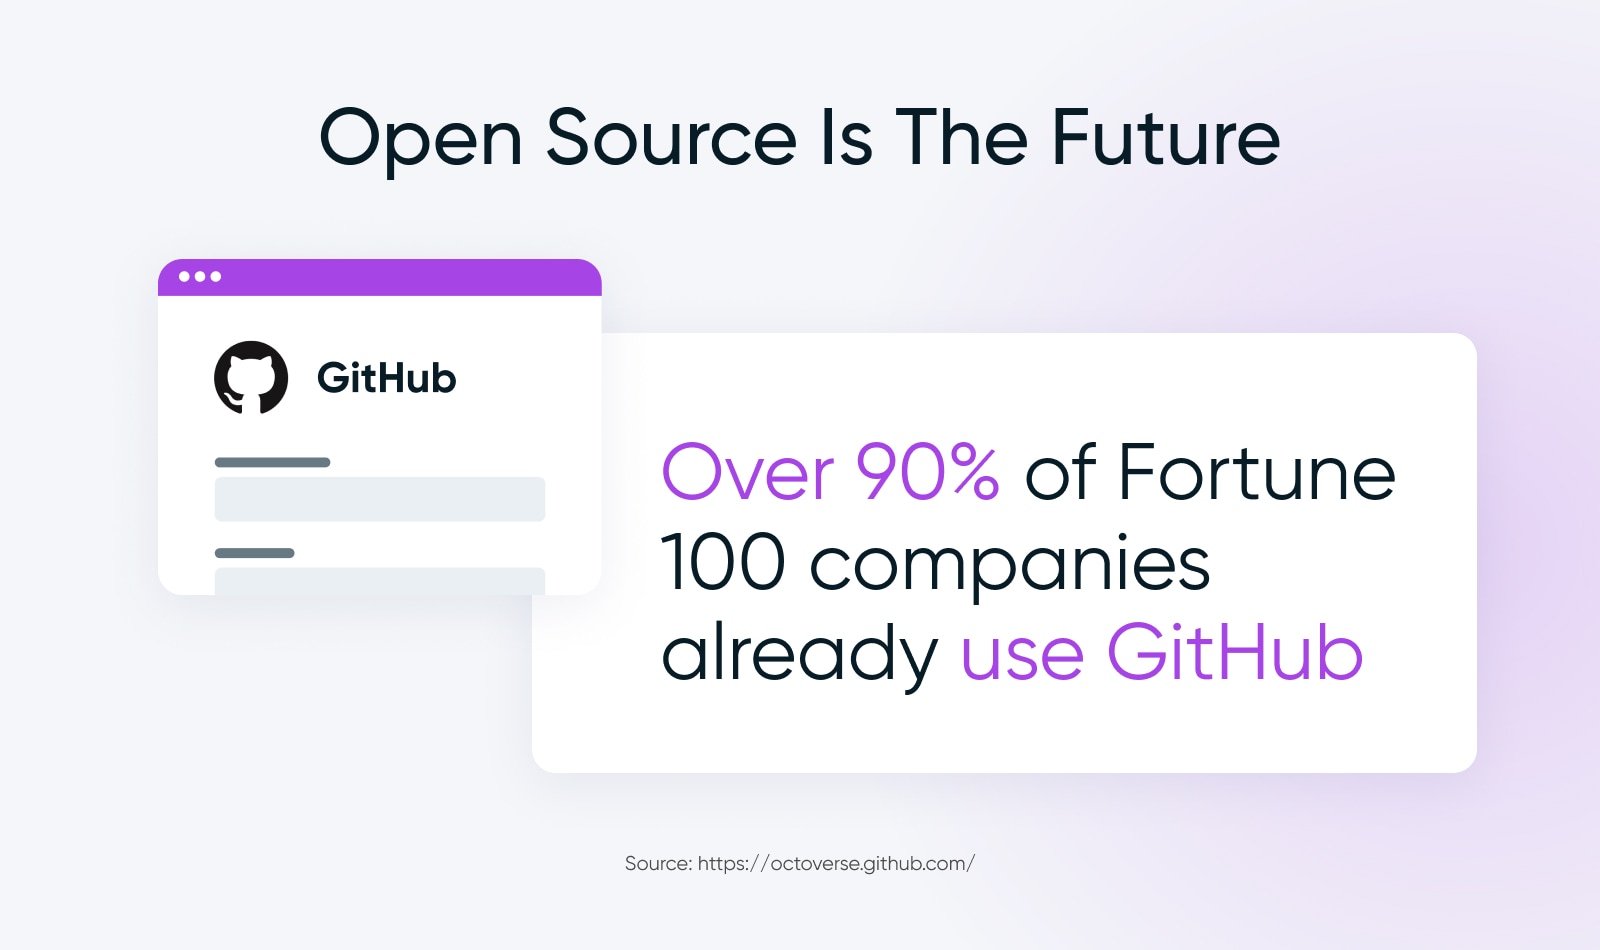
And go you should. After all, open-source, and the Git tech that powers most of it, is the future of business.
Commands In Real Life: How To Develop On WordPress Using Git + GitHub
We just threw a ton of possibly new terms and tricks at you.
If you aren’t deep into Git, it can be hard to see how these can all come together to work in a real-life scenario.
So we’ll top things off with a walkthrough of how to use Git and GitHub to set yourself up to develop on a WordPress website.
1. Install WordPress.org
First up, the WordPress part.
You’re going to install a WordPress.org instance (learn the difference between WordPress.com & WordPress.org if you’re not familiar) and create a local staging environment on your computer.
If you don’t already have a great process for this, we like Local’s WP-specific dev tool.
2. Install Git
And just like that, it’s time for the Git part.
Install Git if you haven’t already. Find the latest version on the Git website.
Many Mac and Linux machines already have Git installed. Check yours by opening your command line interface (like Terminal on Mac or Git Bash on Windows) and entering the first command of this tutorial:
git --version
If Git is there, you’ll get a version number back. If not, this Git installation guide will get you on your way.
3. Create A Local Repo With Git
Now, we’ll create your local Git repo.
Access your WordPress theme’s folder (this example includes Twenty Twenty-One) using this command:
cd/Users/[you]/Documents/Websites/[website]/wp-content/themes/twentytwentyone
Replace [you] and [website] with your own folder names. Then, initialize this directory as a repository with this command:
git init
To add every file in the folder to the index, type in:
git add
Commit your changes with a notation that will keep your history organized with this command:
git commit -m “first commit"
Your local repo is configured!
4. Create A Remote Repo With GitHub
At this point, you want to create a GitHub account if you don’t already have one.
Once created and signed in, you can create a remote repository from your GitHub dashboard.
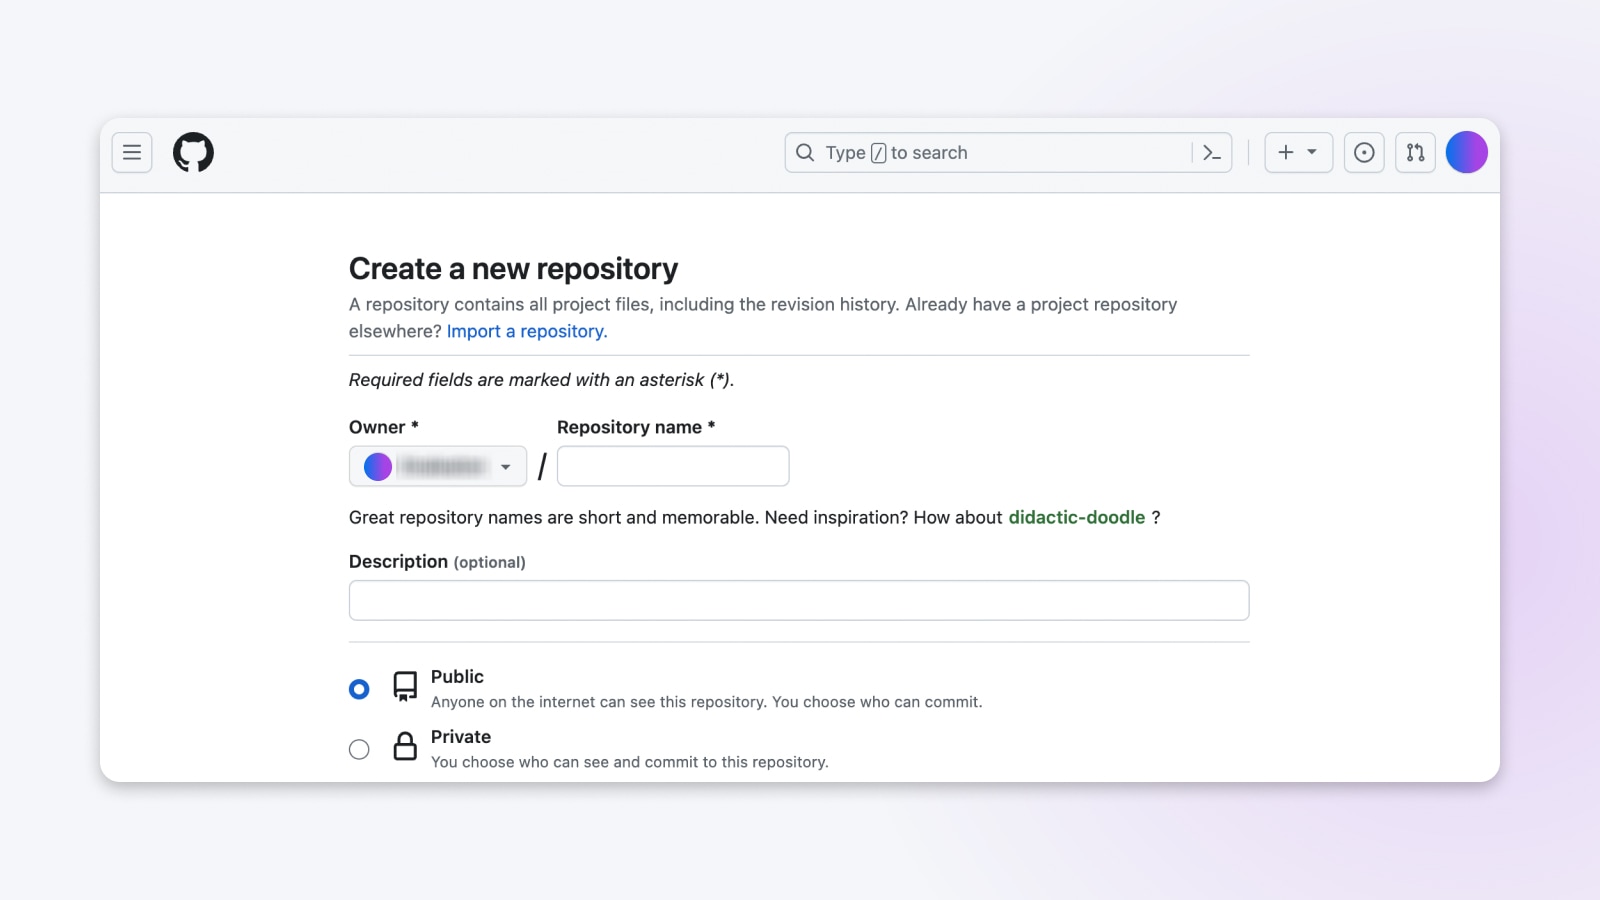
When you’re finished following the steps to set up your new project, it’s time to get your WordPress theme into your new remote repo in GitHub.
5. Add WordPress Project To GitHub (Learning To Push)
Use these commands in Git to push your WordPress theme into GitHub:
git remote add origin [repo URL]
git push -u origin master
Replace the URL in brackets with a link to the repository you just set up in GitHub.
Next, you’ll be asked to enter your GitHub username and password.
Once those are in, files committed to your local repo thus far will be pushed to your GitHub repo.
6. Optional: Fetch (AKA Pull) Updates
Now that you’ve pushed changes from your local repo to the remote repo on GitHub, the last thing to learn is how to pull changes so you can do the reverse — add updates from the remote repo to your local one.
Of course, if you’re working independently on a coding project, you won’t need to do this step. However, it’s helpful to know as it immediately becomes necessary once you’re collaborating with a team who are all making and pushing updates.
So, we’re going to pull updates into local using the fetch command:
git fetch [URL]
Don’t forget to replace [URL] with the link to the repository from which you’re pulling.
With that, changes are pulled from GitHub and copied to your local, so both repos are the same. You’re synced and ready to work on the latest version of the project!
Still need a hand with Git?
For a much more detailed walkthrough of the above process, check out our full guide on How to Use GitHub for WordPress Development.
Or, better yet, engage our development experts at DreamHost.
Let us handle one-off website tweaks to full-on website management, so your team can get back to the development and management work that moves your business forward.
You Dream It, We Code It
Tap into 20+ years of coding expertise when you opt for our Web Development service. Just let us know what you want for your site — we take it from there.